Mỗi phiên bản mới của Microsoft Exchange Server đều cung cấp một số cải tiến so với các phiên bản trước, đặc biệt là về công nghệ lưu trữ. Exchange Server 2019 bao gồm các tính năng cải tiến mang lại hiệu suất tốt hơn và truy cập mailbox nhanh hơn
Trong khi các ổ đĩa JBOD (Just a bunch of disks) là tùy chọn lưu trữ ưa thích kể từ Exchange Server 2010, Exchange Server 2019 giới thiệu tùy chọn sử dụng ổ đĩa thể rắn (SSD) cùng với ổ đĩa JBOD. Hơn nữa, nó còn giới thiệu tính năng tối ưu hóa mức sử dụng database memory, trong đó mức phân bổ bộ nhớ cao hơn cho mailbox databases đang hoạt động trong các database availability groups (DAG). Exchange Server 2019 cũng giới thiệu các công nghệ tìm kiếm và lập chỉ mục giúp cải thiện hoạt động truy cập và tìm kiếm dữ liệu.
Module này giải thích các tính năng và tùy chọn cấu hình cho Exchange Server mailbox databases. Nó cũng mô tả các tùy chọn lưu trữ và cách bạn có thể định cấu hình chúng.
Bài lab sử dụng 2 máy DC1 và EX1 đã cài Exchange Server ở module 1
Exercise 1: Tạo và cấu hình mailbox databases
Task 1: Cấu hình iSCSI storage cho the Mailbox server
- Tại DC1, vào Server Manager, chọn Add Roles and Features.
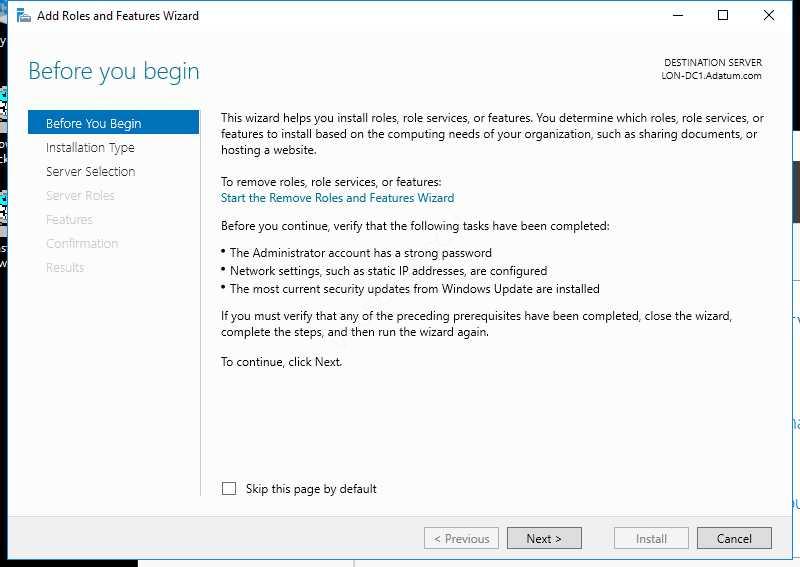
2. Màn hình Before you begin ấn Next
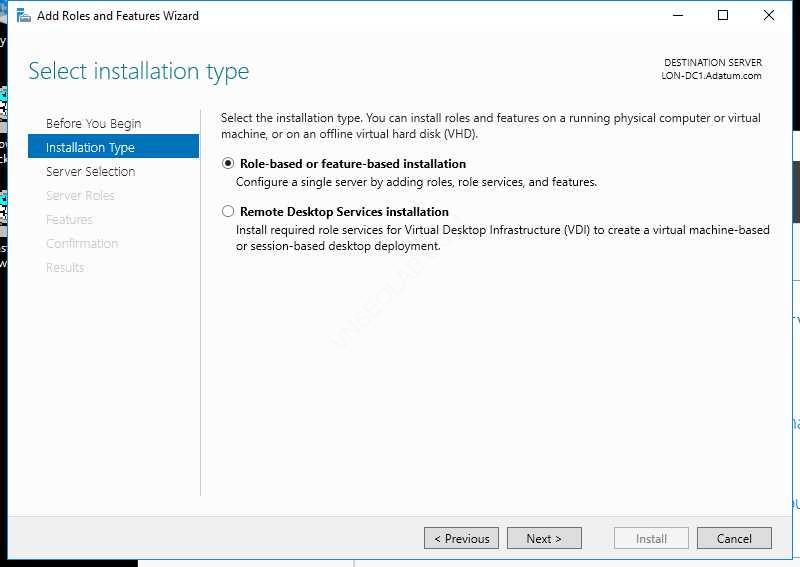
3. Màn hình Select installation type ấn Next.
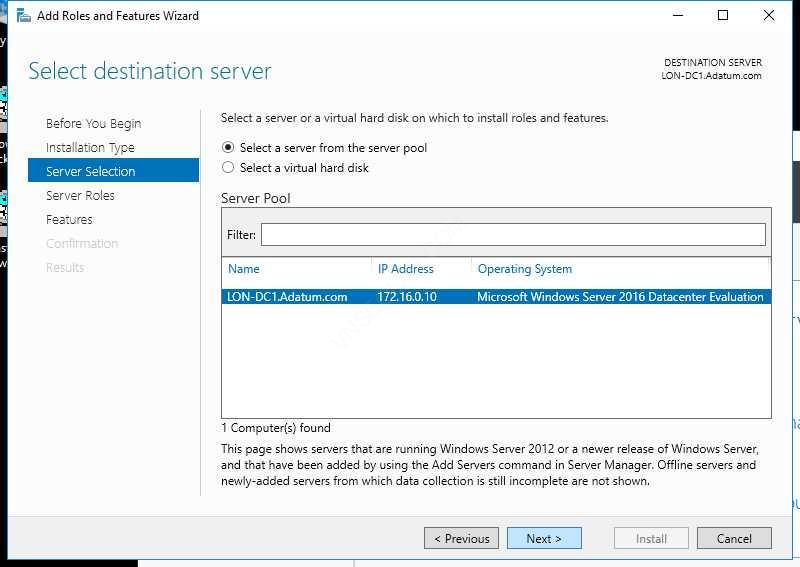
4. Tại màn hình Select destination server, chọn option Select a server from the server pool ấn Next.
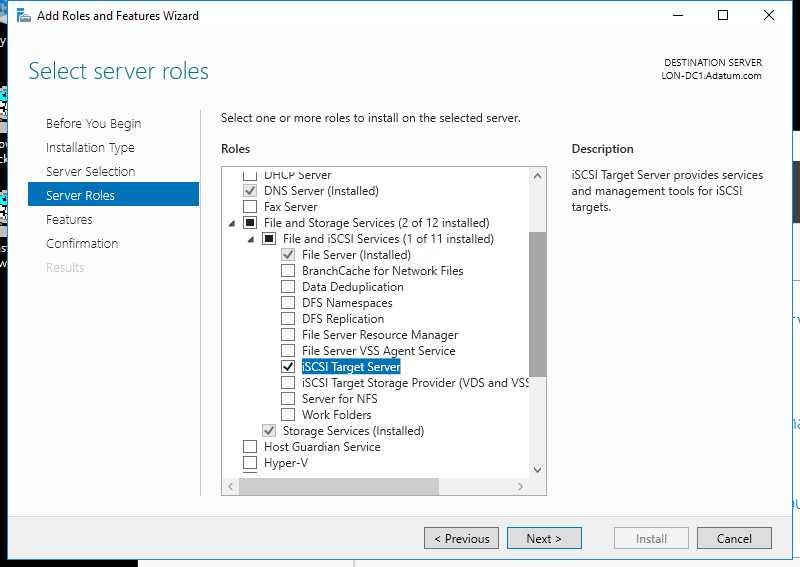
5. Màn hình Select server roles, chọn File And Storage Services (2 of 12 installed), chọn File and iSCSI Services (1 of 11 installed), check vào iSCSI Target Server và ấn Next.
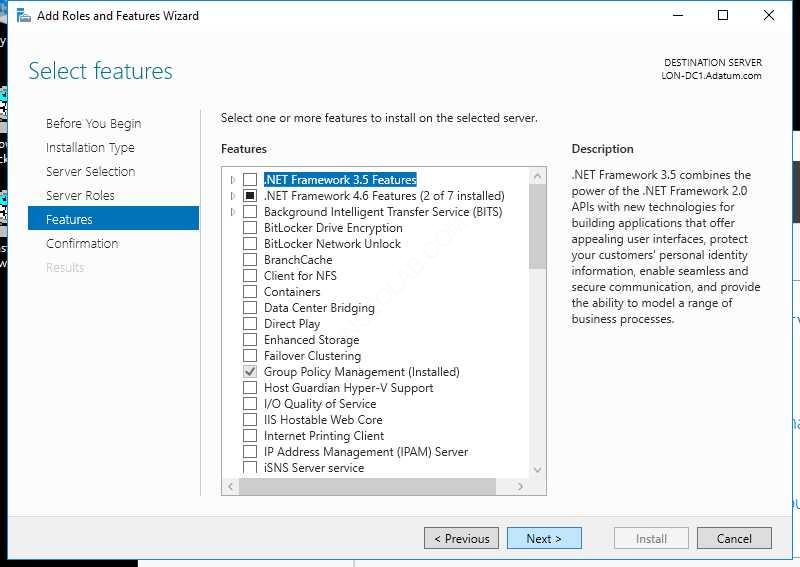
6. Màn hình Select features, ấn Next.
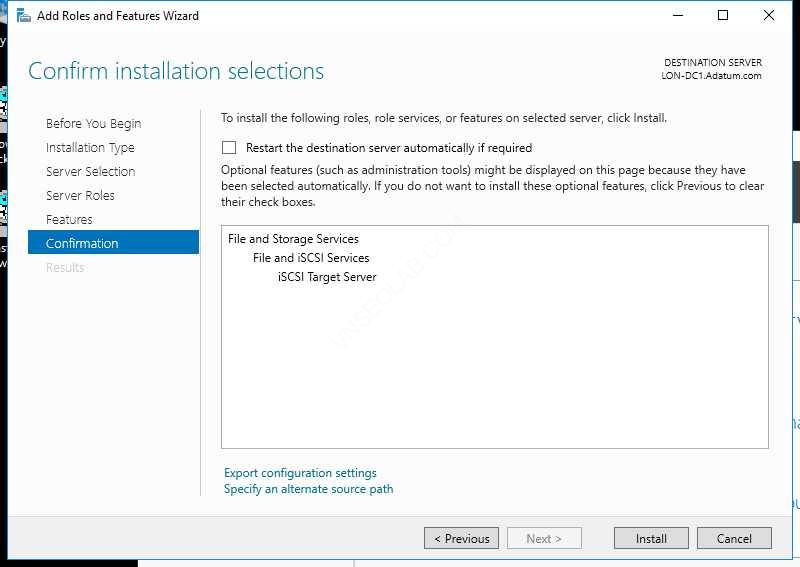
7. Màn hình Confirm installation selections ấn Install
8. Chờ cài đặt xong ấn Close

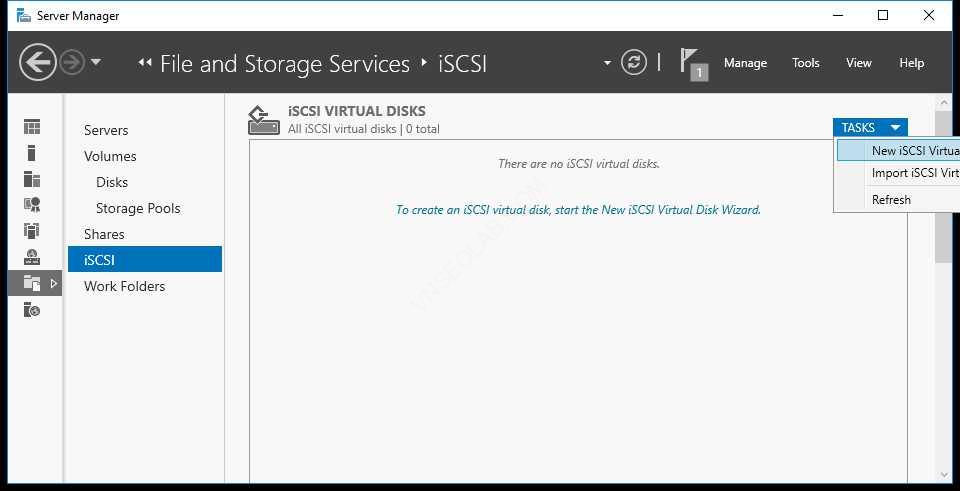
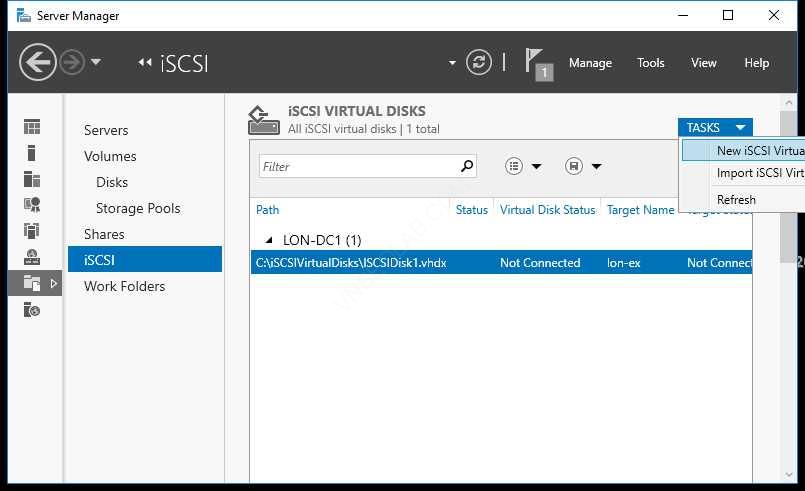
9. Cũng tại Server Manager, chọn File and Storage Services.
10. Tại màn hình File and Storage Services, chọn iSCSI.
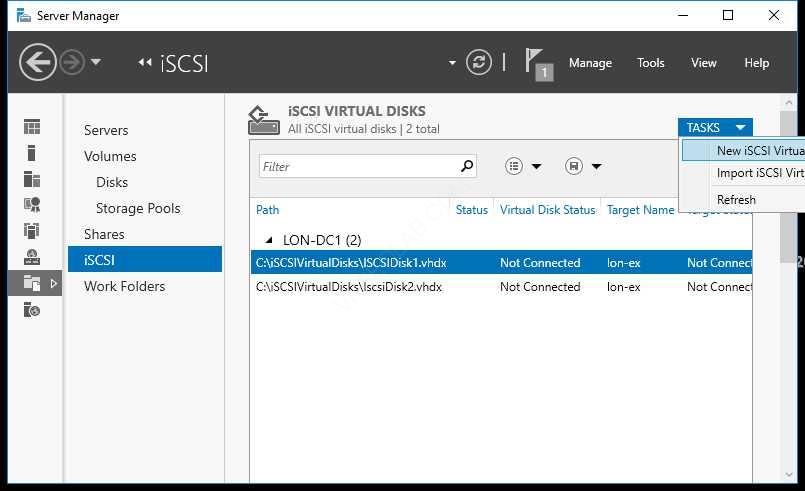
11. Trong màn hình iSCSI VIRTUAL DISKS, chọn TASKS, và chọn New iSCSI Virtual Disk.
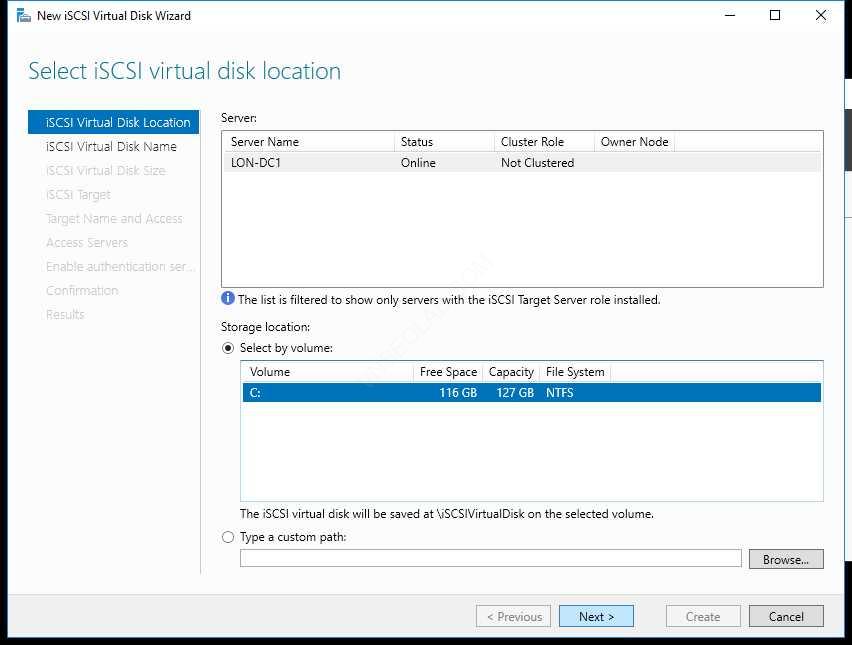
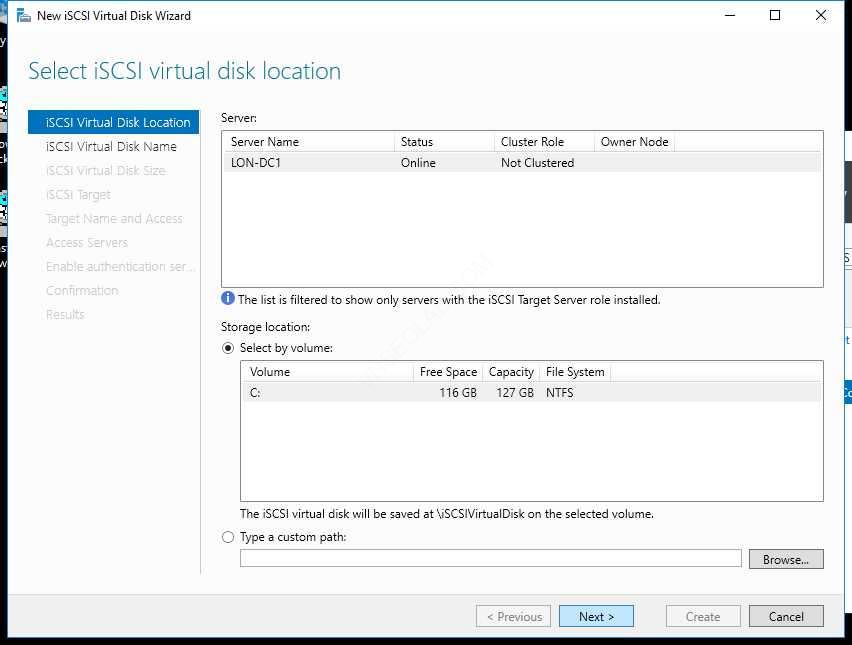
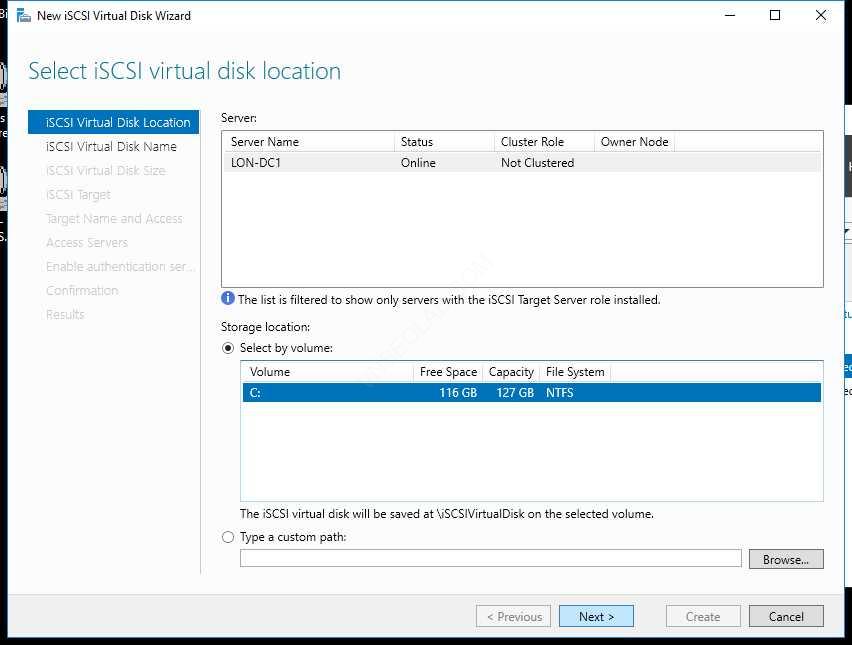
12. Tại màn hình Select iSCSI virtual disk location, trong phần Storage location chọn C:, và ấn Next
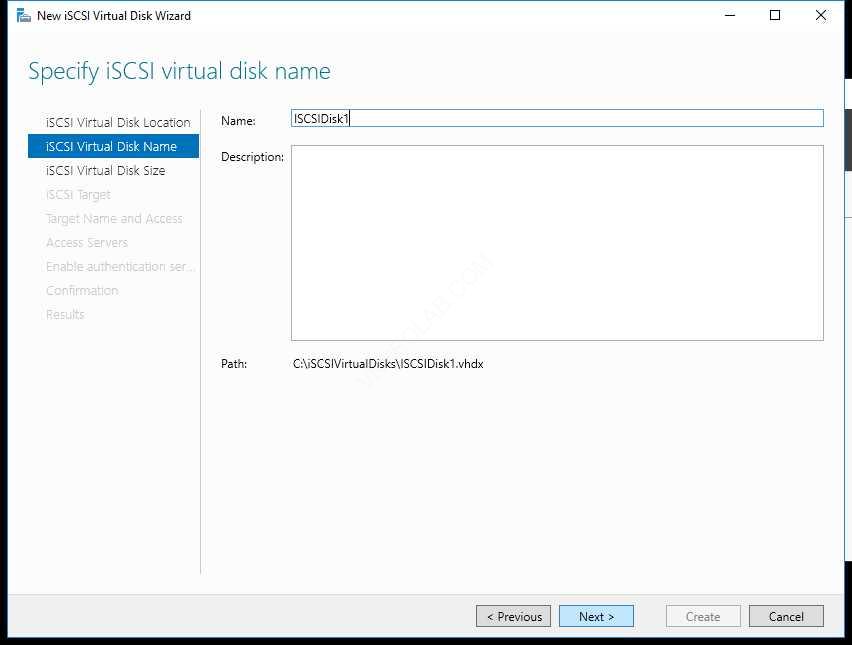
13. Màn hình Specify iSCSI virtual disk name, trong phần Name gõ vào iSCSIDisk1, ấn Next
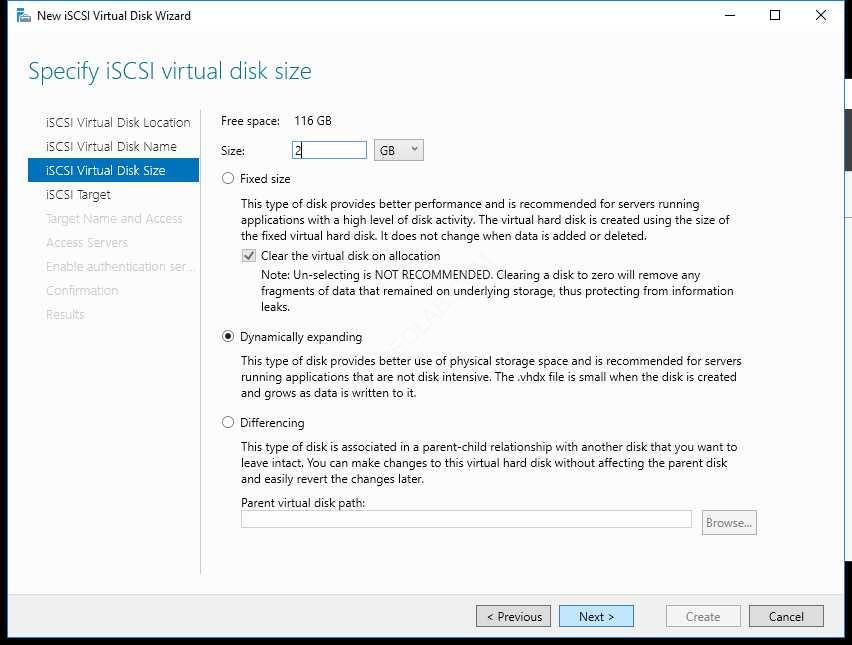
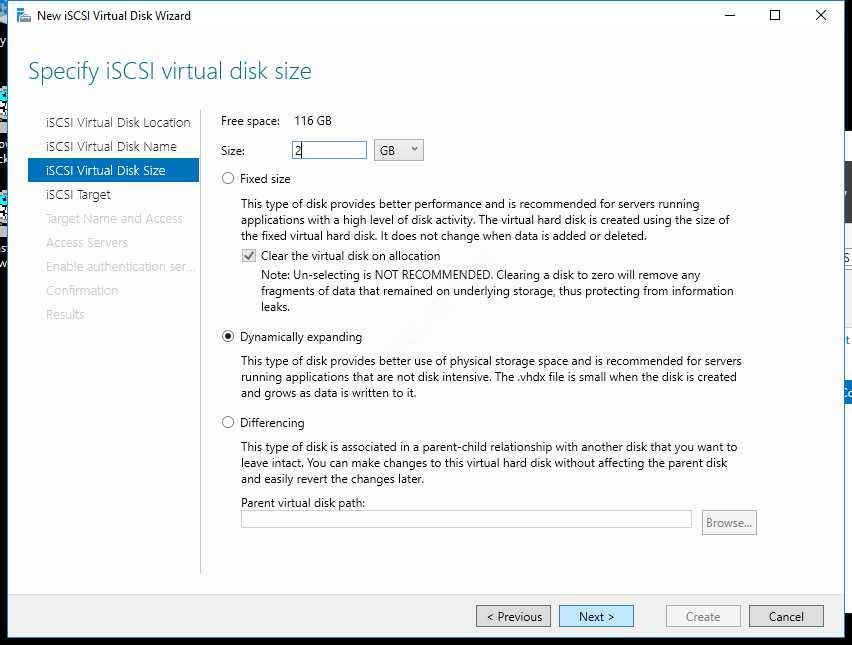
14. Tại màn hình Specify iSCSI virtual disk size, trong phần Size nhập vào số 2, đơn vị là GB, chọn option Dynamically expanding, ấn Next.
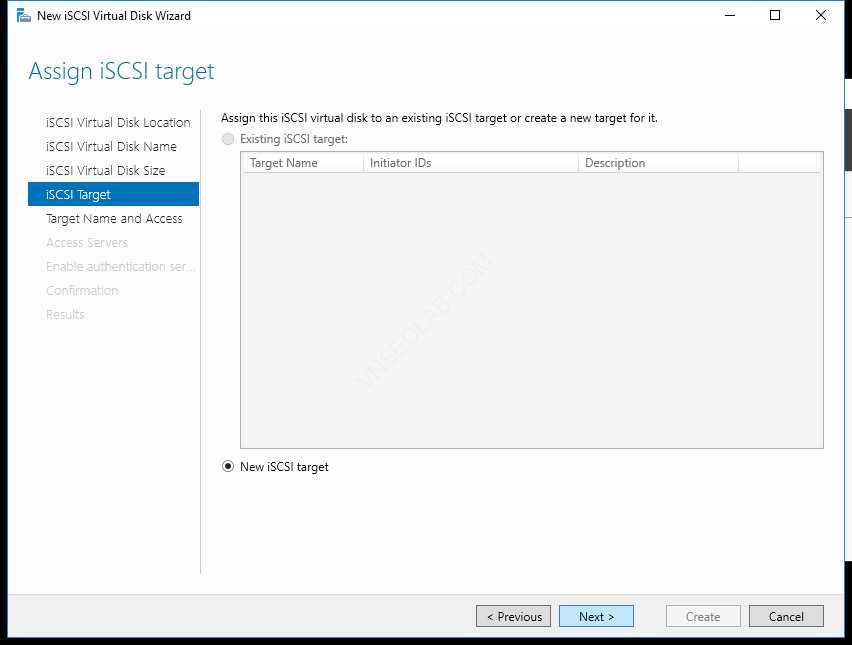
15. Tại màn hình Assign iSCSI target, chọn New iSCSI target, và ấn Next
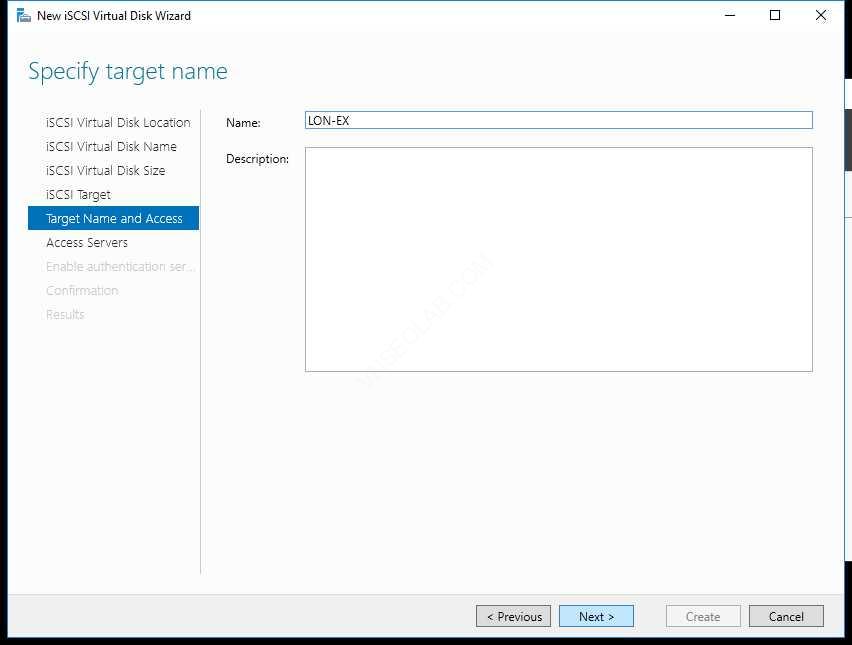
16. Màn hình Specify target name, trong phần Name, nhập vào EX1, và ấn Next
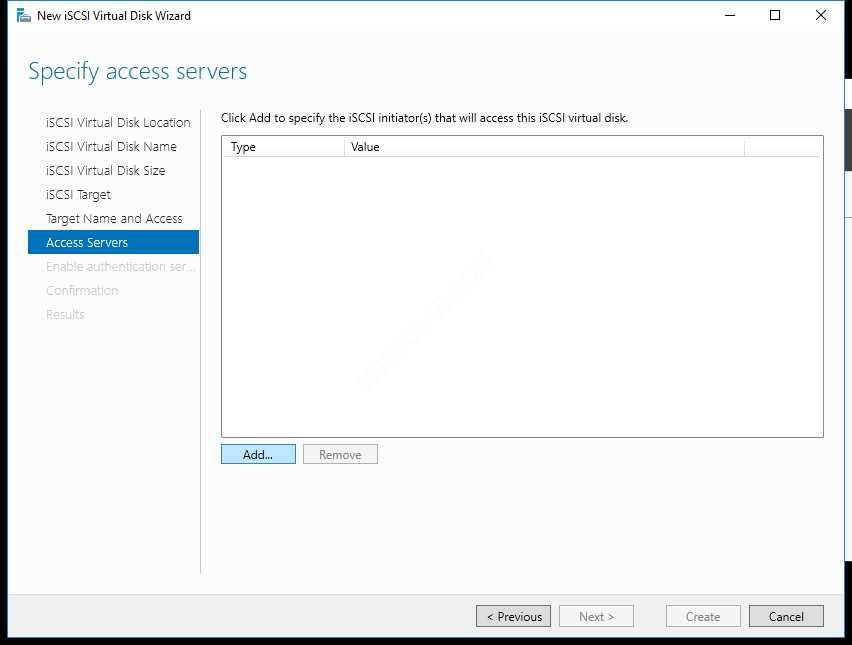
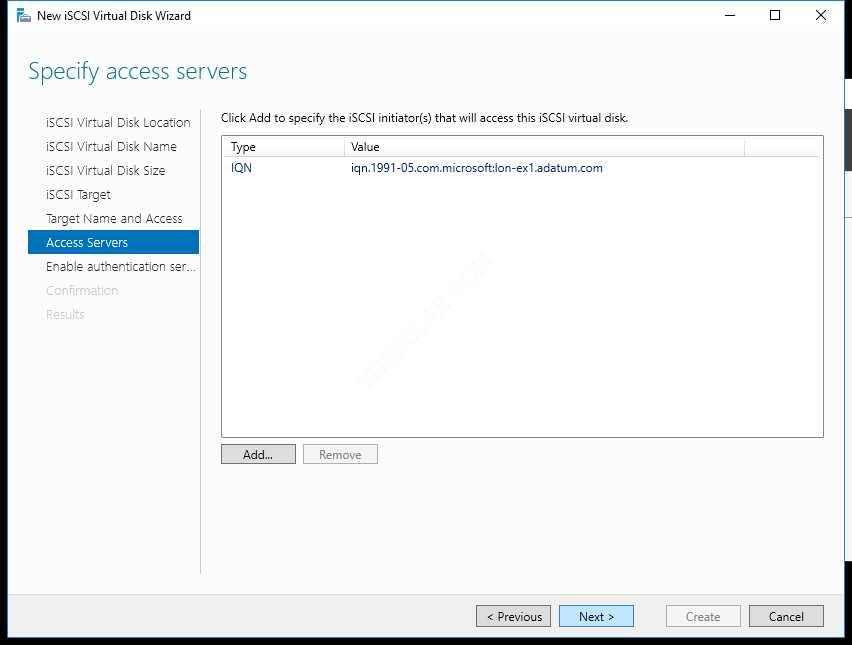
17. Màn hình Specify access servers, chọn Add
18. Tại màn hình Select a method to identify the initiator chọn Browse.
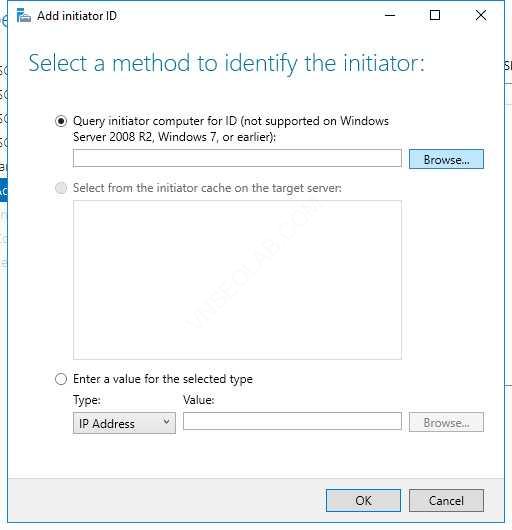
19. Cửa sổ Select Computer, nhập vào EX1, click Check Names, và OK.
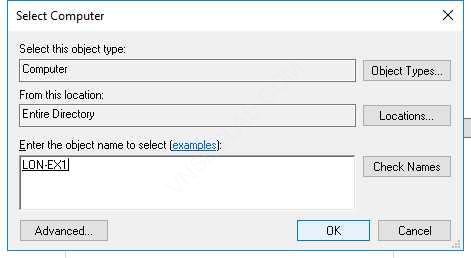
20. Tiếp tục ấn OK. Nếu bị lỗi, click Cancel, khởi động lại EX1, đăng nhập vào quyền admin administrator, và trở lại DC1, làm lại từ bước 9.

21. Màn hình Specify access servers, click Next
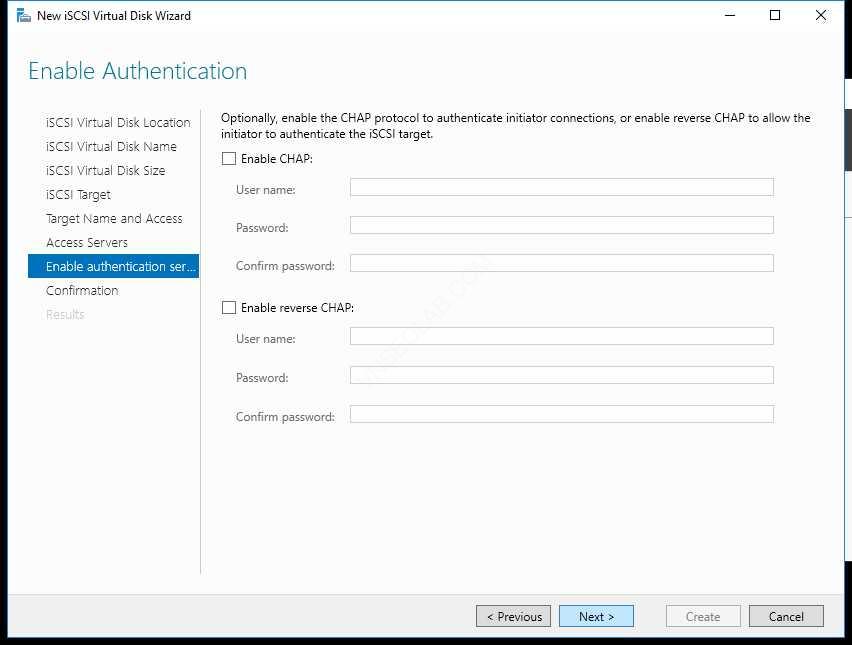
22. Màn hình Enable Authentication, ấn Next.
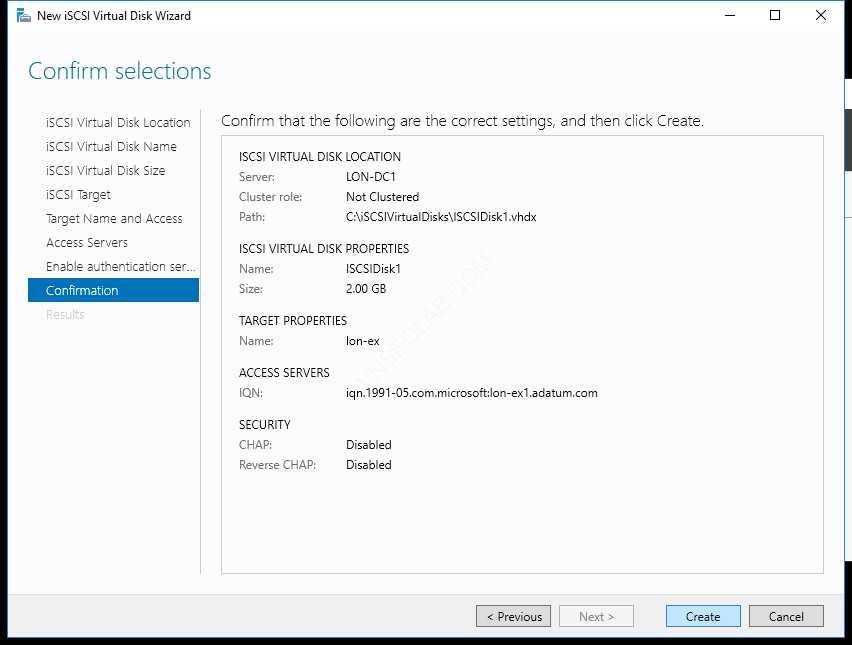
23. Màn hình Confirm selections, ấn Create.
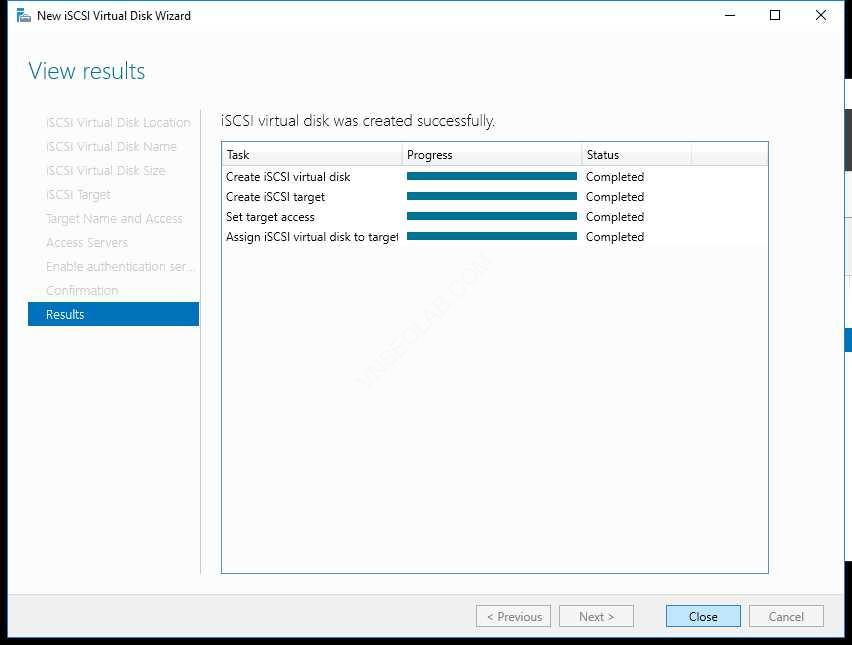
24. Tại màn hình view results, chờ cho đến khi hoàn tất, click Close
25. Cũng tại iSCSI VIRTUAL DISKS, click TASKS, Tiếp tục chọn New iSCSI Virtual Disk.
26. Màn hình Select iSCSI virtual disk location, trong phần Storage location chọn C:, và ấn Next
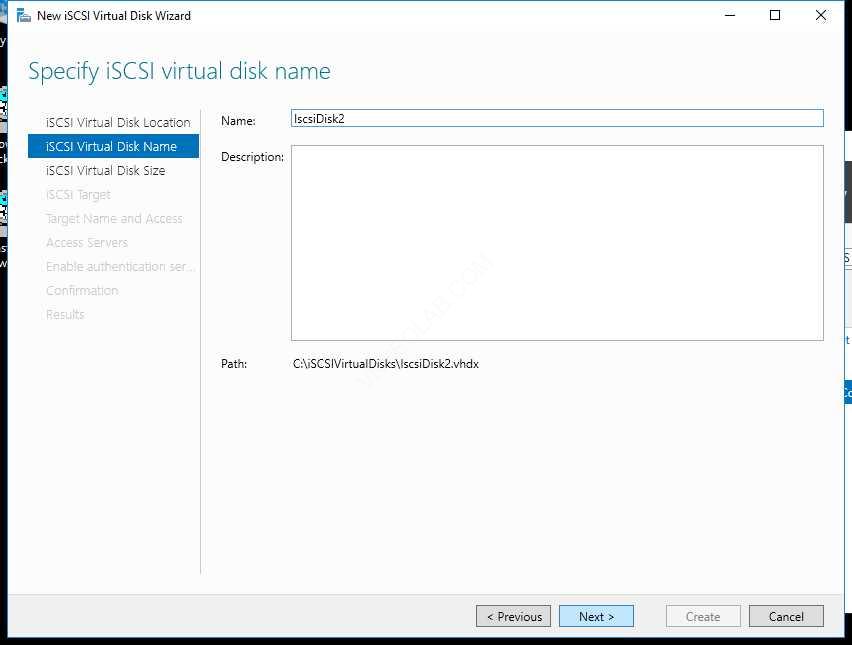
27. Màn hình Specify iSCSI virtual disk name, Trong phần Name, nhập vào iSCSIDisk2, và ấn Next
28. Màn hình Specify iSCSI virtual disk size, trong phần Size nhập vào 2, và chọn đơn vị là GB, chọn option Dynamically expanding, ấn Next.
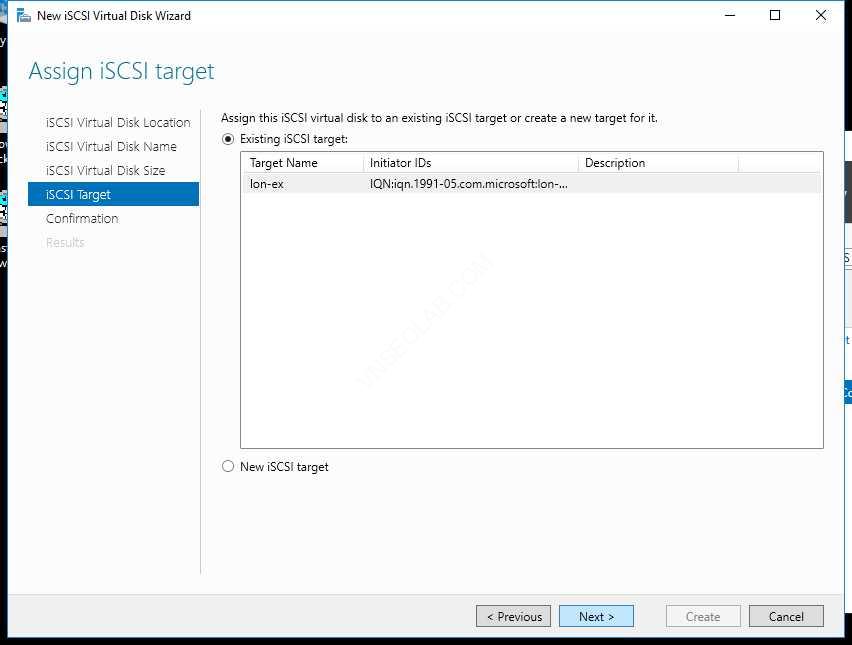
29. Màn hình Assign iSCSI target, click ex1, và ấn Next.
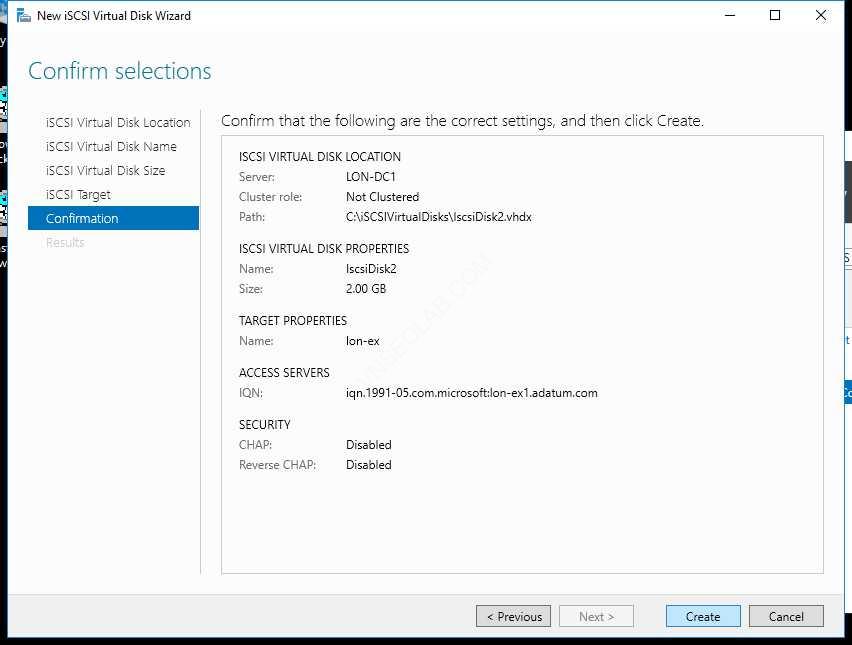
30. Màn hình Confirm selections ấn Create.
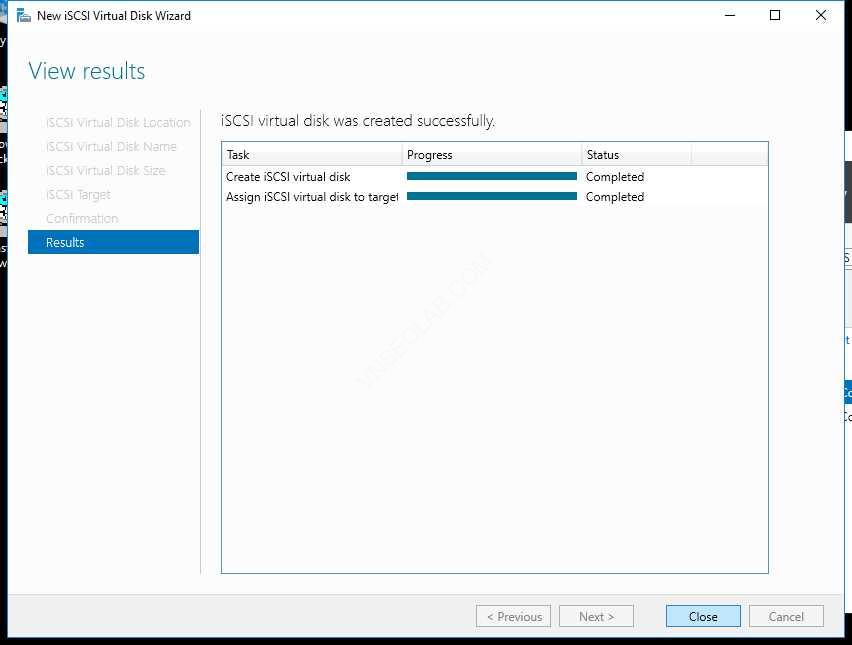
31. Màn hình View results, chờ cho đến khi hoàn tất ấn Close.
32. Tiếp tục, tại màn hình iSCSI VIRTUAL DISKS, chọn TASKS, và chọn New iSCSI Virtual Disk
33. Tại màn hình Select iSCSI virtual disk location, trong phần Storage location, chọn C:, và ấn Next.
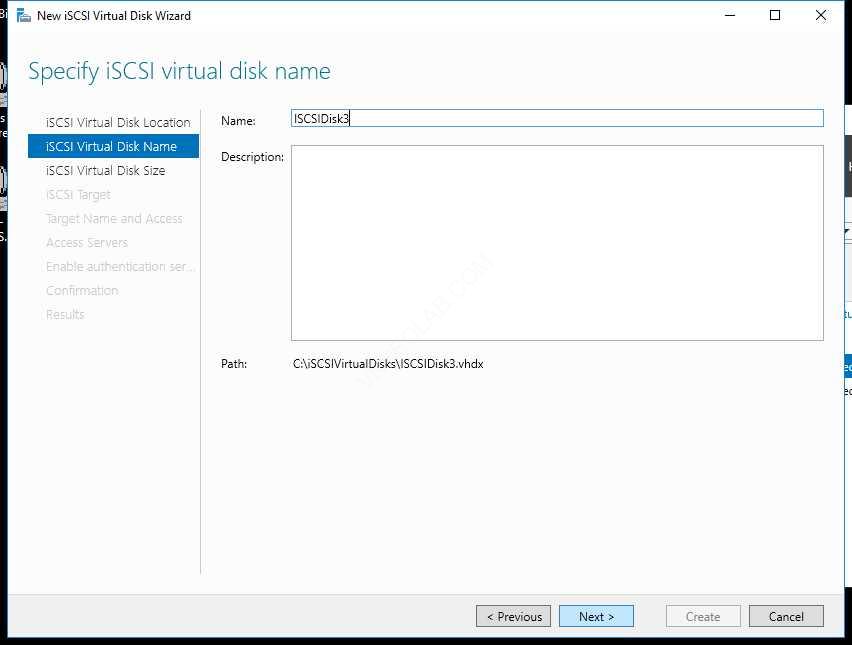
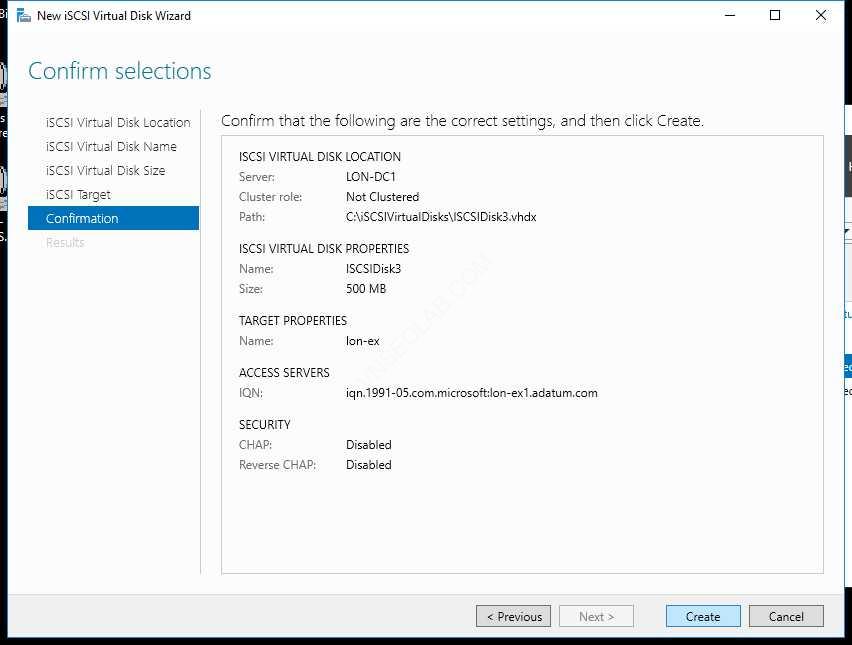
34. Màn hình Specify iSCSI virtual disk name, trong phần Name nhập vào iSCSIDisk3, và ấn Next.
35. Màn hình Specify iSCSI virtual disk size, trong phần Size nhập vào 500, và chọn đơn vị là MB, chọn option Dynamically expanding, ấn Next.

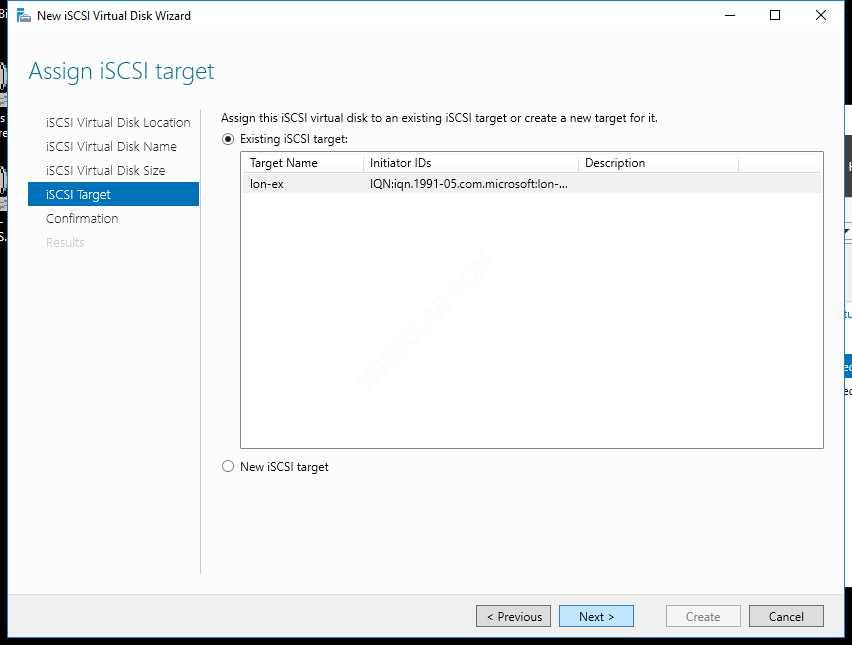
36. Màn hình Assign iSCSI target, chọn0ex1, và ấn Next.
37. Màn hình Confirm selections, ấn Create.
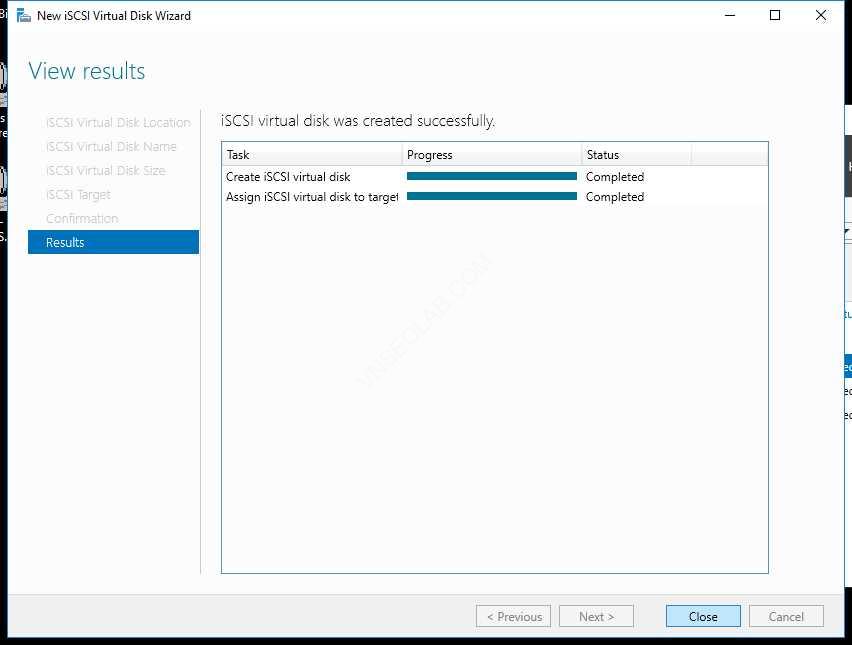
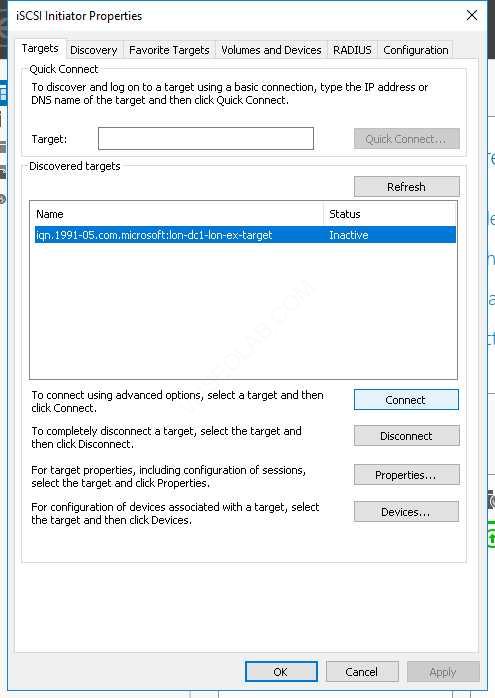
38. Màn hình View results, chờ cho đến khi hoàn tất ấn Close.
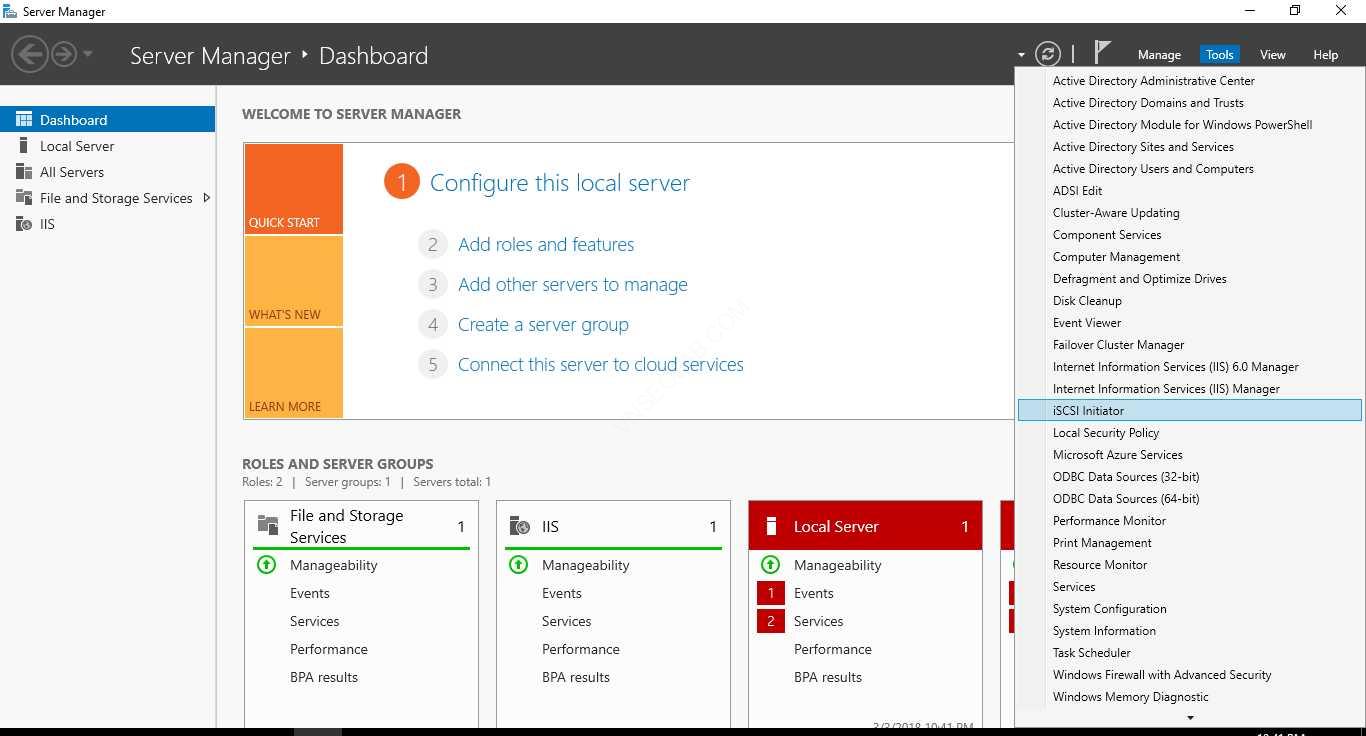
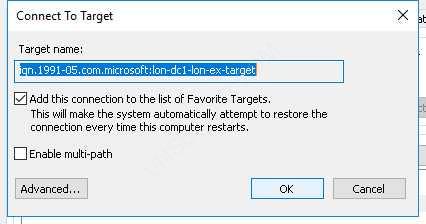
39. Qua máy EX1, vào Server Manager chọn Tools, và chọn iSCSI Initiator
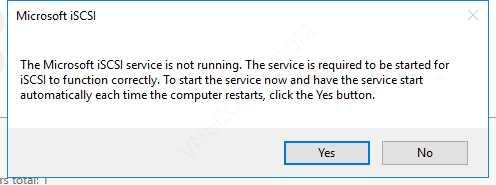
40. Cửa sổ Microsoft iSCSI xuất hệ ấn Yes.
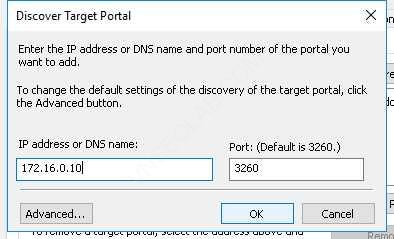
41. Chọn tab Discovery, và ấn Discover Portal.
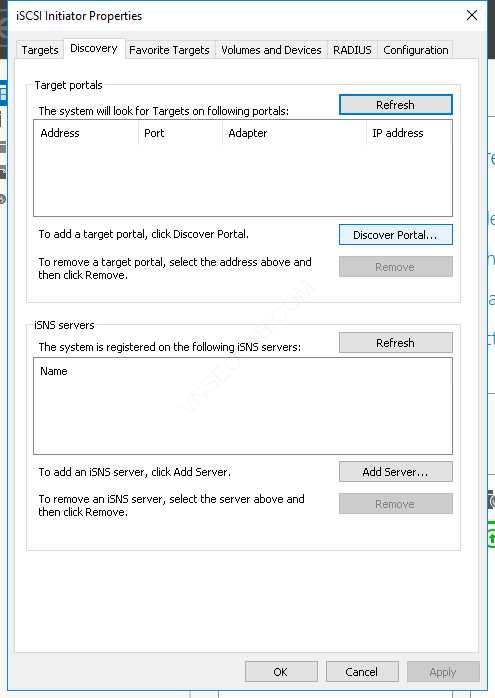
42. Trong phần IP address or DNS name, nhập vào IP của DC1, ấn OK.
43. Qua tab Targets, ấn Refresh, chọn iqn.1991-05.com.microsoft:lon-dc1-lon-ex1-target, và ấn Connect
44. Check vào Add this connection to the list of Favorite Targets, ấn OK 2 lần.
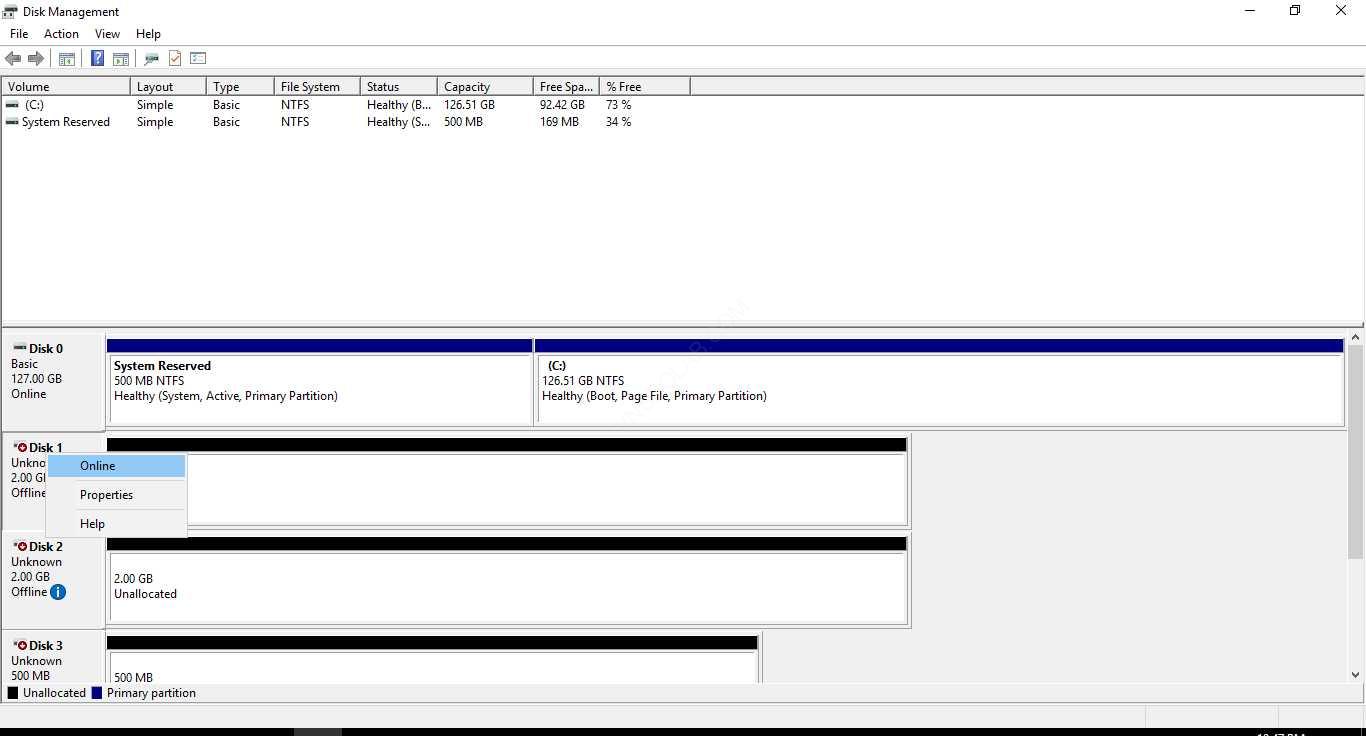
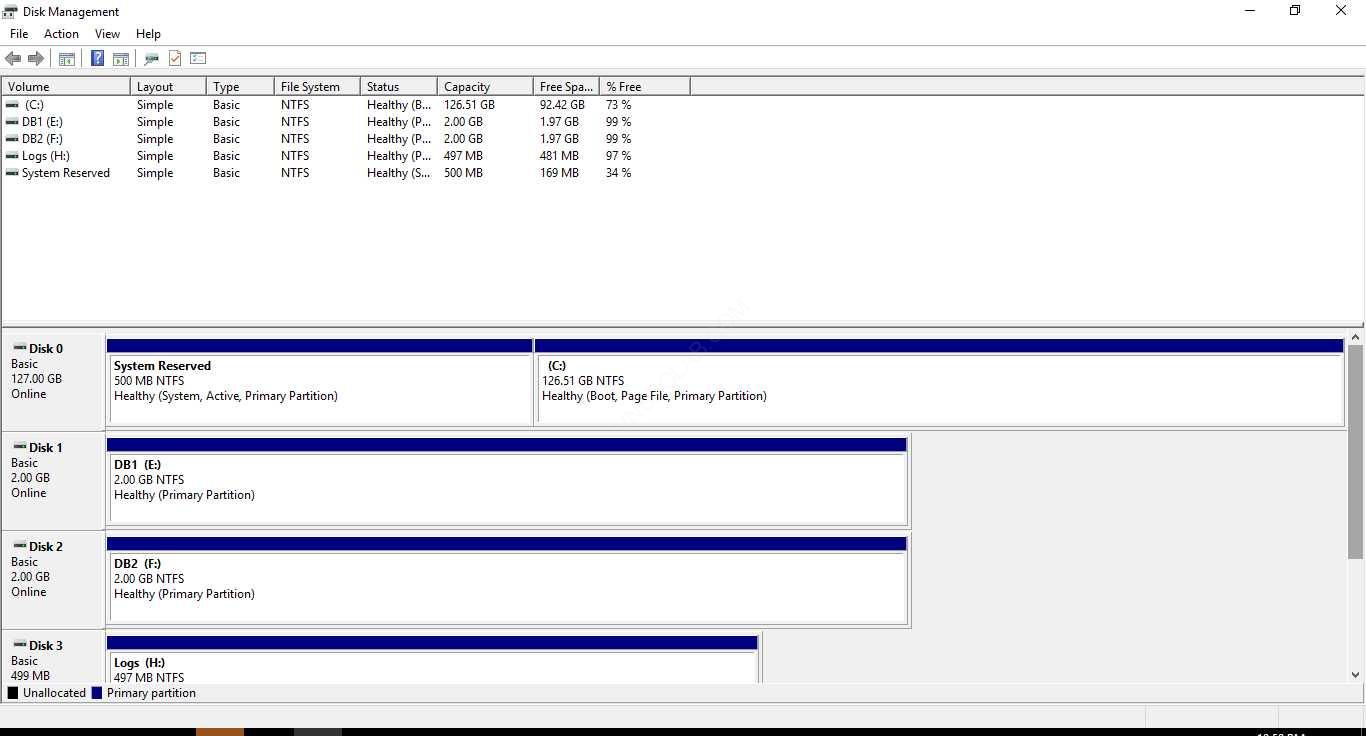
- Vào Run gõ lệnh Diskmgmt.msc, enter
45. Phải chuột vào Disk 1, chọn Online
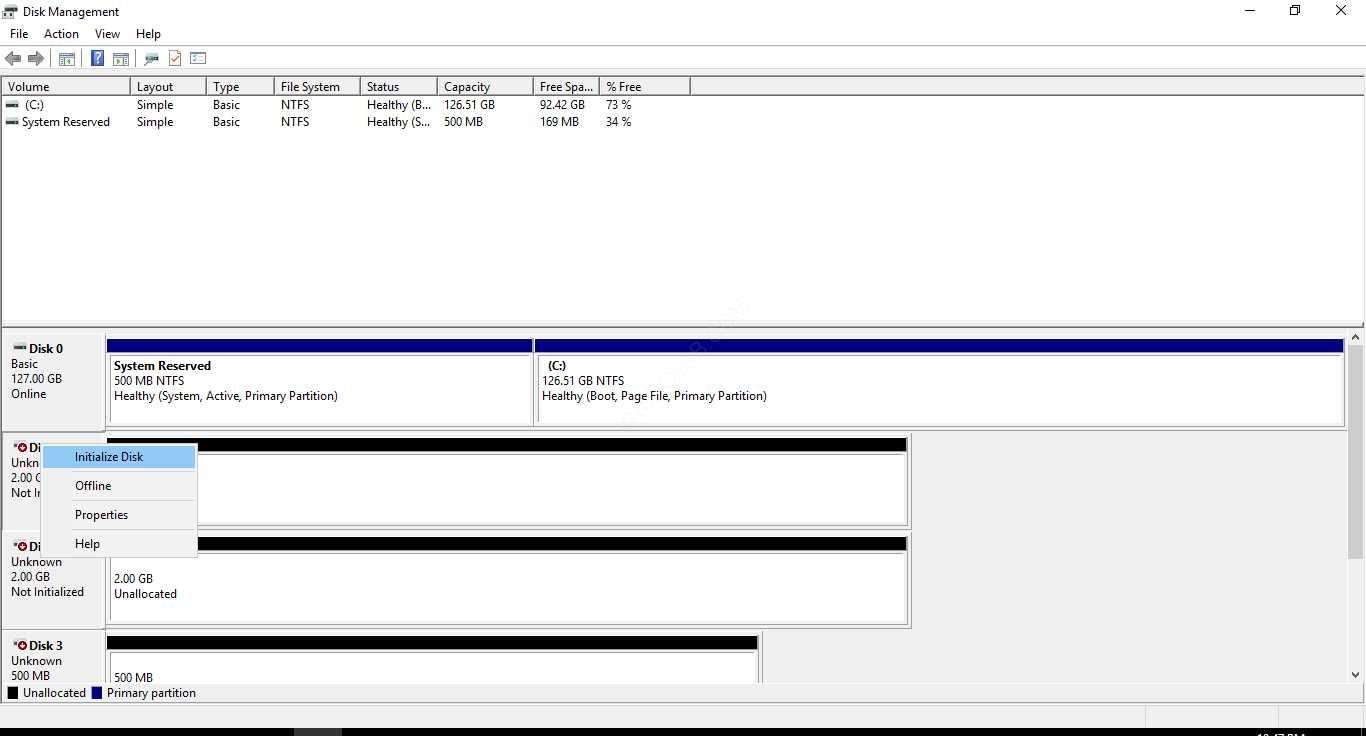
46. Tiếp tục phải chuột vào Disk 1, chọn Initialize disk, ấn OK
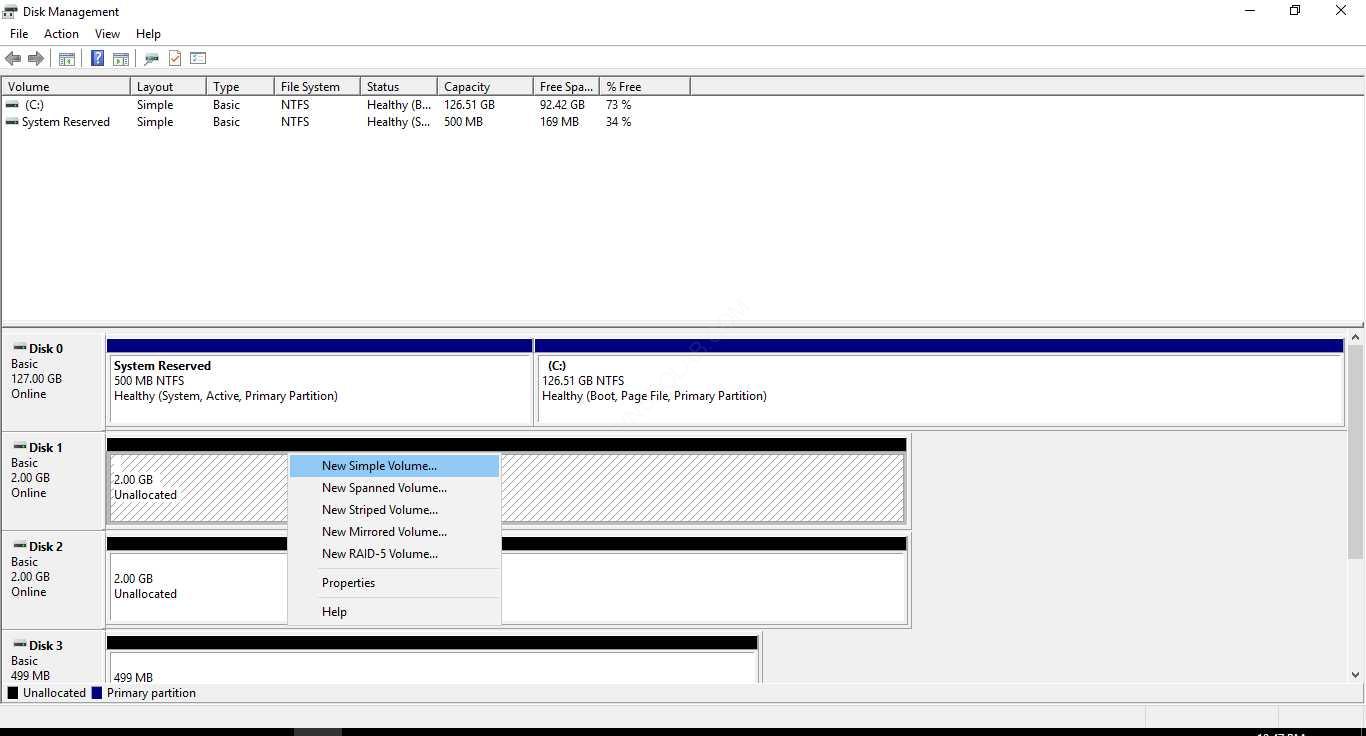
47. Phải chuột vào vùng trống của Disk 1, chọn New Simple Volume.
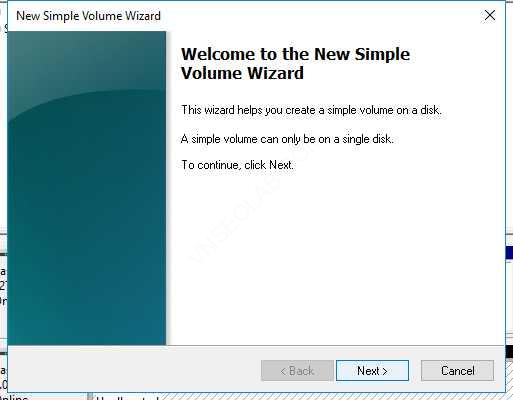
48. Màn hình Welcome to the New Simple Volume Wizard ấn Next
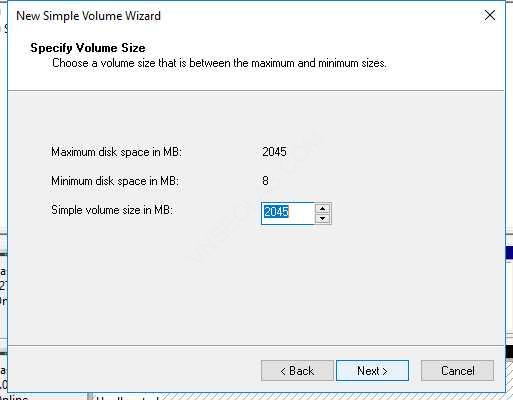
49. Màn hình Specify Volume Size ấn Next
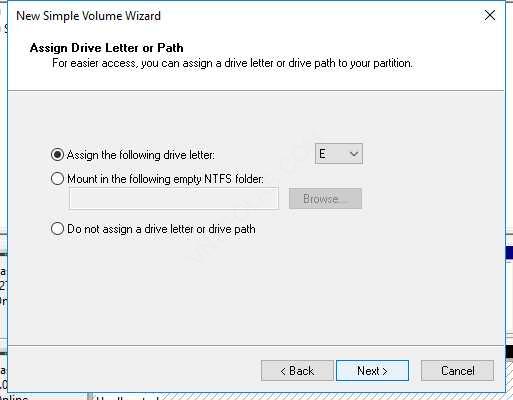
50. On the Assign Drive Letter or Path page, click Next
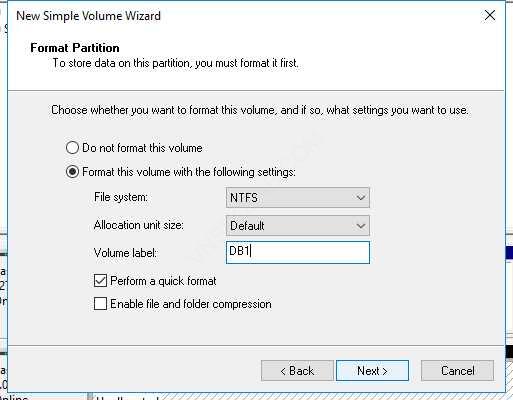
51. Màn hình Format Partition, trong phần Volume Label nhập vào DB1. Chọn check box Perform a quick format, ấn next và Finish.
52. Làm lại từ bước 46 đến 52 cho Disk 2 and Disk 3. Và đặt tên Volume Label lần lượt là DB2 và Logs. Đóng của sổ Disk Management.
Task 2: Thiết lập và cấu hình mailbox database
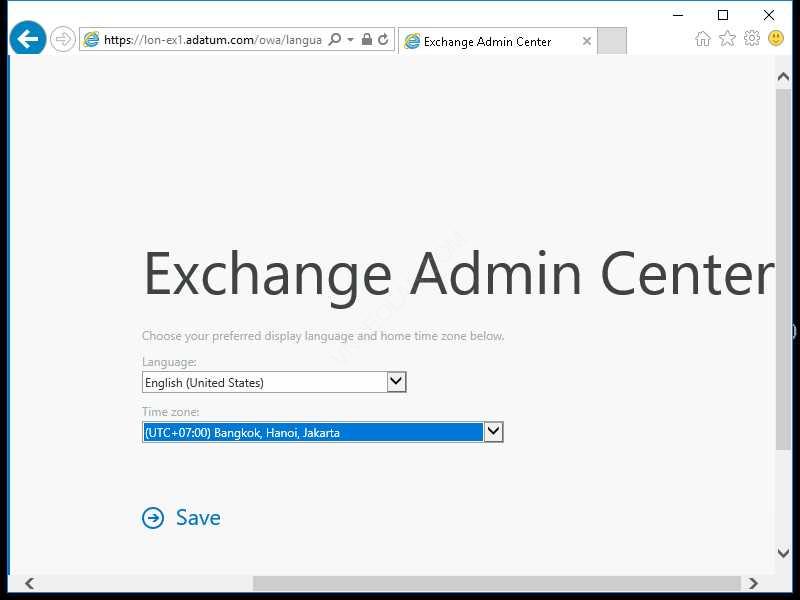
- Tại EX1, vào Internet Explorer.
- Truy cập vào https://ex1.ctloc.local/ecp, bằng domain\Administrator
- Tại Exchange Admin Center, chọn time zone, và ấn Save
+
4. Tại Exchange admin center, bên trái chọn servers, và chọn tab databases. Click vào dấu (+)

5. Màn hình New Database gõ vào MB1 trong phần mailbox database và ấn Browse
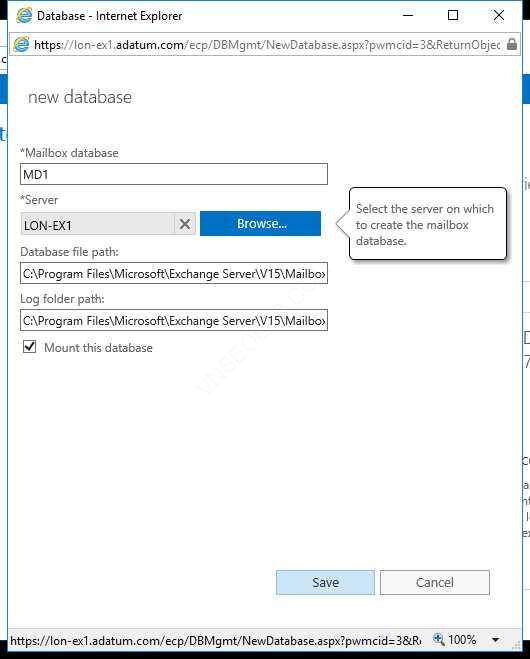
6. Chọn EX1, ấn OK, ấn Save
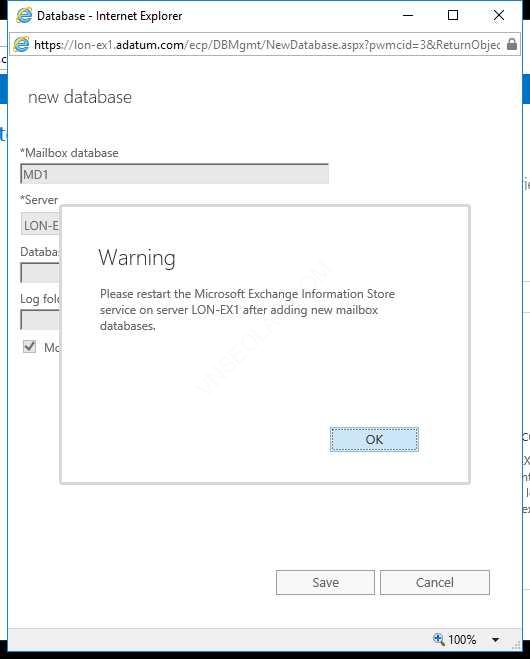
7. Màn hình cảnh báo ấn OK.
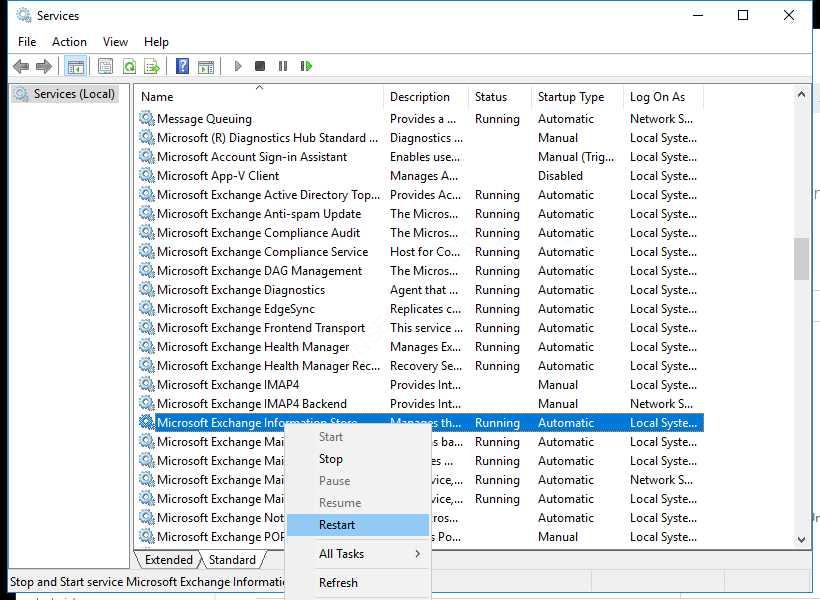
8. Vào Run gõ lệnh Services.msc, enter
9. Phải chuột vào Microsoft Exchange Information Store service, chọn Restart.
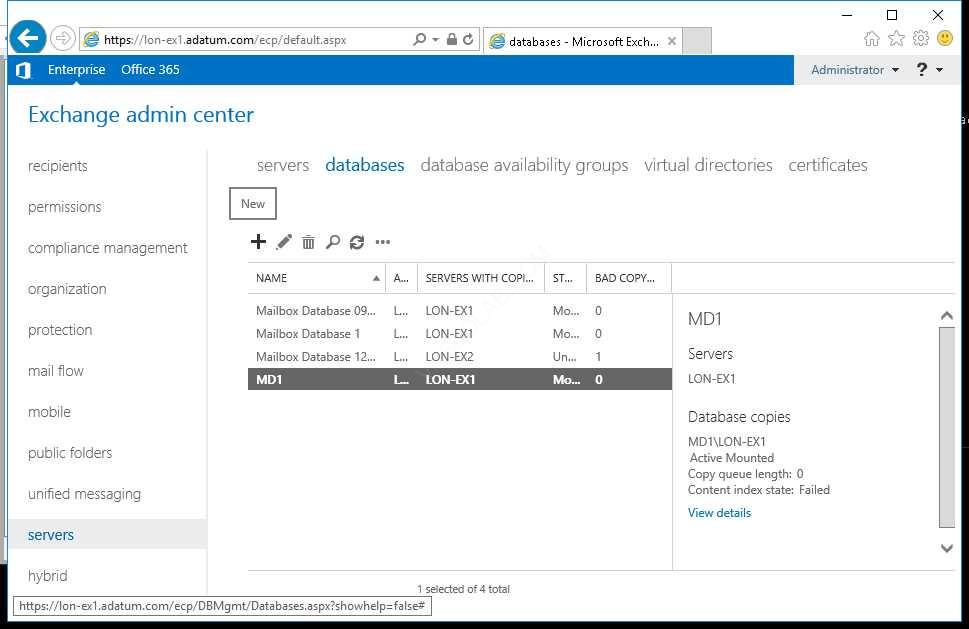
10. Trở lại Exchange admin center, double-click MB1
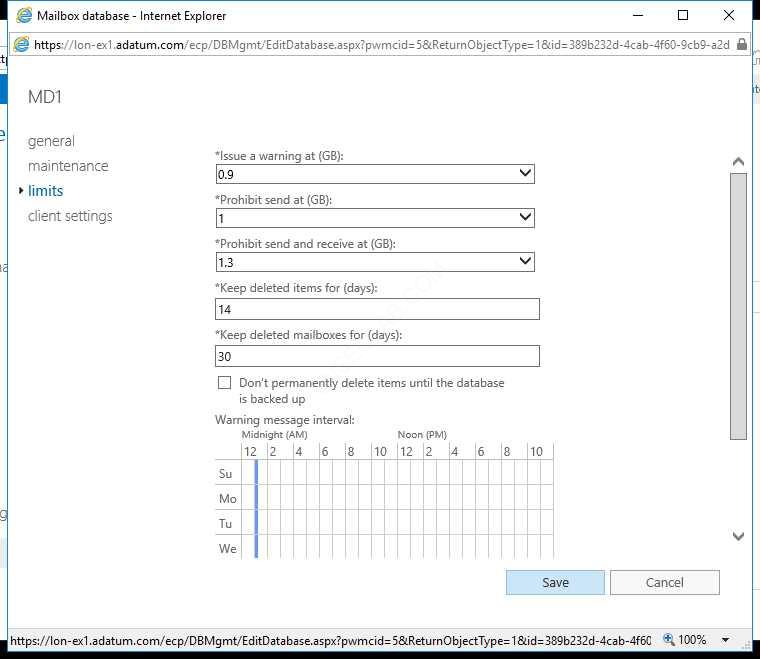
11. Tại màn hình Mailbox database của MD1, chọn limits.
12.Trong phần Issue a warning at (GB) nhập vào 0.9.
13. Trong phần Prohibit send at (GB): nhập vào 1.
14. Trong phần Prohibit send and receive at (GB): nhập vào 1.3.
15. Trong phần Keep deleted items for (days): nhập vào 30. ấn Save.
16. Thu nhỏ cửa sổ Exchange admin center
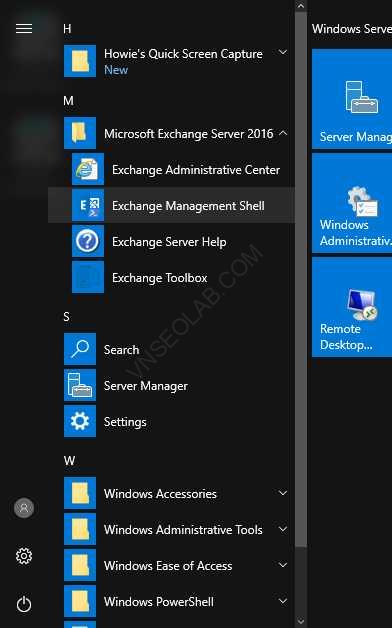
17. Tại EX1, vào Start, chọn Microsoft Exchange Server 2016/2019 và chọn Exchange Management Shell.
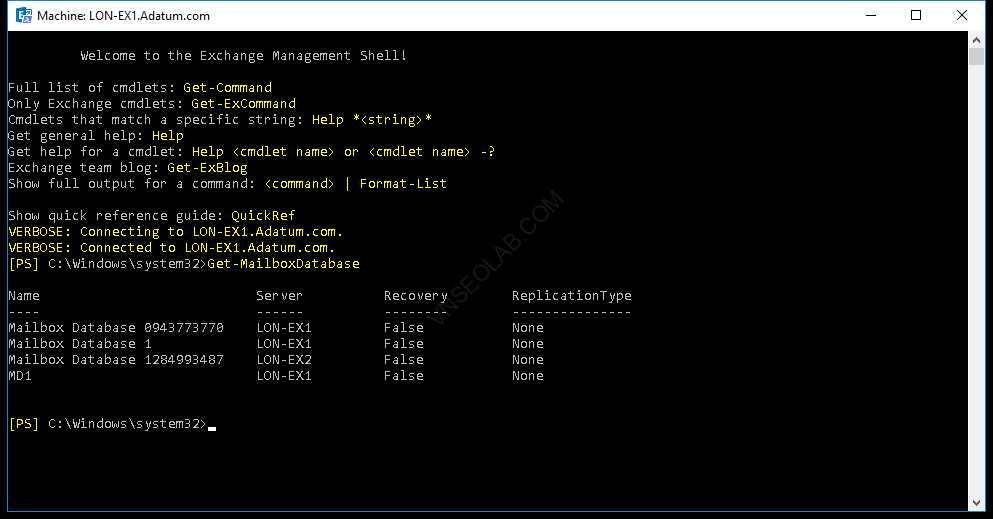
18. Tại Exchange Management Shell, gõ lệnh Get-MailboxDatabase, ấn Enter
19. Xem danh sách mailbox databases đã tạo.
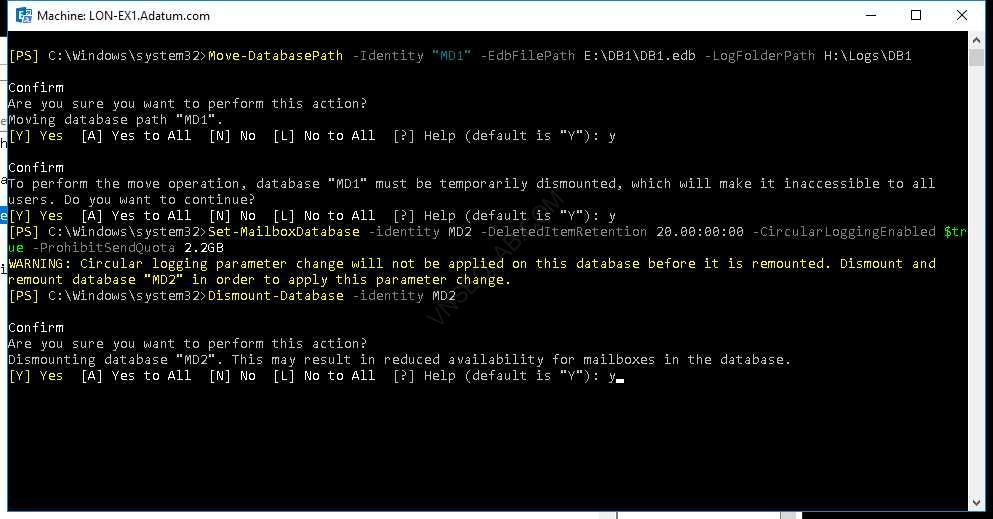
20. Tại Exchange Management Shell tiếp tục gõ lệnh sau và Enter:
Move-DatabasePath –Identity “MB1” –EdbFilePath E:\DB1\DB1.edb –LogFolderPath G:\Logs\DB1
21. Gõ Y enter 2 lần
22. Thu nhỏ Exchange Management Shell.
23. Vào File Explorer, vào đĩa E:\, kiểm tra trong folder DB1 có file database là DB1.edb.
24. Vào đĩa G:\, kiểm tra xem có folder Logs\DB1. Đóng File Explorer.
Task 3: Tạo và cấu hình thêm mailbox databases
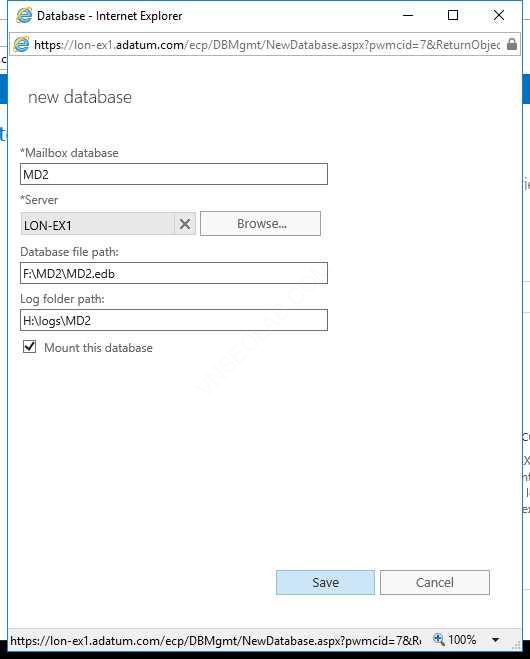
- Trở lại cửa sổ Exchange admin center, Click vào servers và chọn tab databases, ấn New (+)
2. Trong cửa sổ Database trong phần Mailbox database nhập vào MB2
3. Click Browse.
4. Màn hình Server window, chọn EX1, ấn OK
5. Trong phần Database file path nhập vào F:\DB2\DB2.edb
6. Trong phần Log folder path nhập G:\Logs\DB2
7. Bảo đảm rằng check box Mount this database đã được chọn, ấn Save. và OK
8. Trở lại cửa sổ Exchange Management Shell, gõ lệnh sau và enter
Set-MailboxDatabase –identity MB2 –DeletedItemRetention 20.00:00:00 –CircularLoggingEnabled $true –ProhibitSendQuota 2.2GB
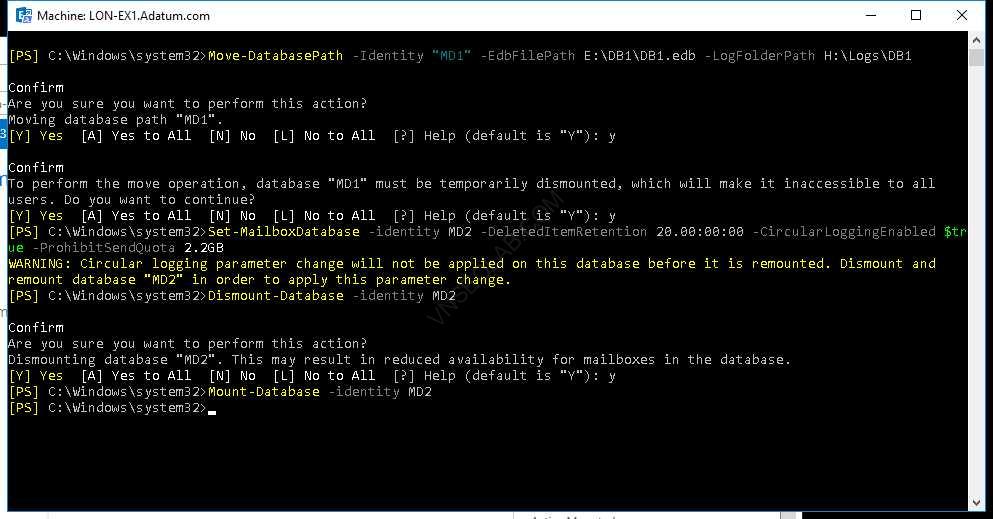
9. Gõ tiếp lệnh Dismount-Database –identity MB2, enter, ấn Y
10. Sau đó gõ lại lệnh Mount-Database –identity MB2

Hoàn tất bài lab